Having alpacas means having fiber…LOTS of fiber…and deciding what to do with that fiber.
Even though I studied textiles, pattern drafting and tailoring and had my own dressmaking business for years, I had to learn from the ground up (literally!) how fiber became garments.
So, I have taken or participated in every fiber sorting, classing, spinning and weaving workshop within driving distance or on the internet. I’m also part of some pretty awesome Facebook fiber groups (you know who you are!!) where I have learned from folks with years of experience under their belts who are eager and patient enough to share with the likes of me!
![]()
One thing that rings true through it all is that proper preparation is key to quality finished items. So, I’ve accumulated most of the necessary tools for the tasks at hand. Some of these tools are pretty pricey and the further you get into processing your own fiber, you learn what works for you, what you like and what you don’t like, what you absolutely need and what you don’t need and what you might be able to make yourself. Trial and error can add up quickly!
My family mottos are “Use what you have to make what you need” and “Make do, do over, or do without”.
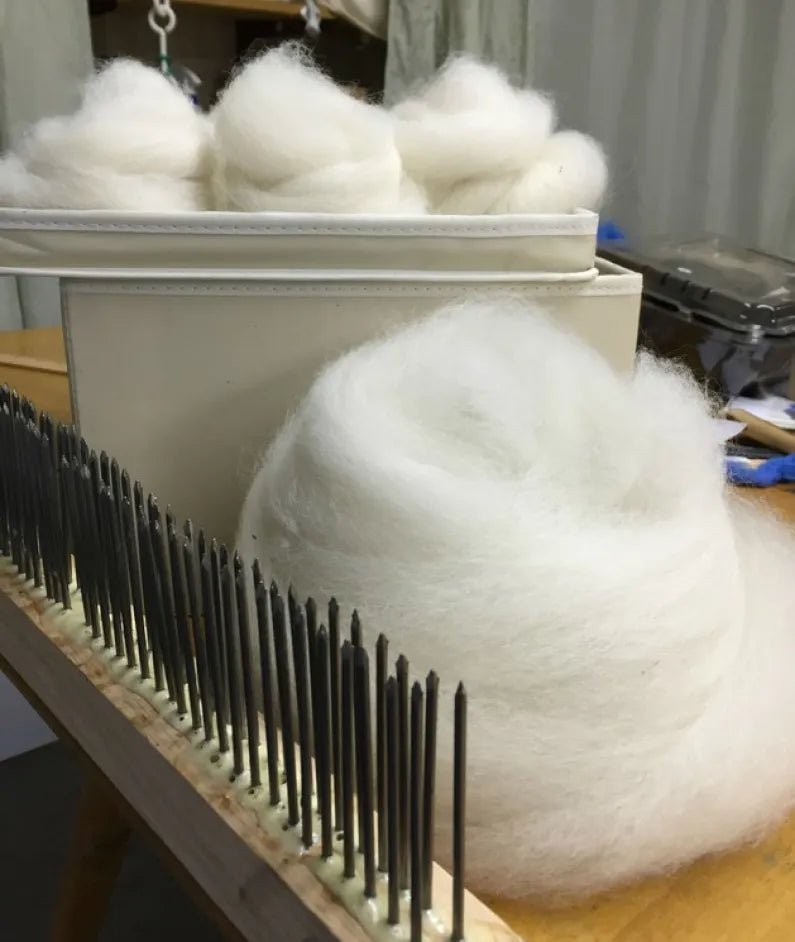
Being a pretty resourceful person and having investigated hackles by dragging my family to the Stahlstown Flax Scutching Festival (one of the oldest in the country) for over 20 years and inspired by my new best fiber friends I decided that I could probably build a hackle myself.
What is a Hackle? According to the Merriam-Webster Dictionary, a hackle is “a comb or board with long metal teeth for dressing flax, hemp, or jute” and in my case, alpaca fiber.
Here’s how I did it. I think the total cost was around $20.
WHAT YOU NEED:
- A 36″ 2×2 piece of wood-I used oak but you could use poplar. I think pine might be too soft
- 2 boxes of 16d 3.5″ long finishing nails (84 per box- you are going to drill 168 holes!)
- 1- 2 oz bottle of Elmer’s Glue-All Max (what my hardware store recommended and since my mom worked for Borden’s a brand I love!
- Pencil
- Drill
- 3/32 drill bit, or what you find fits your nail best (I had to fiddle around and experiment)
- Clamps
- Sandpaper
- Saw horses or table
- A shorter piece of lumber (about a 2 foot piece) to align the nails
I made my hackle 30″ long because I wanted to make monster nests-less joining when spinning. You can cut your wood to make a shorter hackle. A longer hackle can also allow you to load longer fibers on one end and as you get to the bottom of the comb where the fibers may be slightly shorter in length, load those on the other end.

Draw 2 parallel lines the length of the piece of wood 1/2″ from each long edge (they will be 1/2″ apart…a 2x 2 is actually 1 1/2 x 1 1/2).
Then about 2″ in from the left edge (how I did it, you can start from the right if you like!) on one line with the pencil, draw a notch and then from there make notches every 3/8 of an inch until you are about 2 inches from the other side.
You will repeat notching on the second line starting 3/16 of an inch from the first notch of the first line and then every 3/8 of an inch from the first notch so that the nails will be staggered.
Now the drilling begins. This took a while and I took a LOT of breaks.
Clamp the wood to your table or sawhorses.Drill along the board on your notches, making the holes about 1/4 inch deep.

When you finish drilling, sand the holes and flip the wood over and tap to empty any saw dust out of the holes.
Time to insert the nails! Put a dab of the Elmer’s Glue-All Max into the holes. I did about 10 at a time. Place the nail bottom side down (pointed side up) into the hole and gently tap in with a hammer. I started with a wooden mallet but switched to a regular metal hammer because the nails kept getting suck in the wood of the mallet!
Periodically I would make sure the nails were aligned with another short board along the back and top.
After I finished inserting the nails, I added another dab of the glue. After it dried, it kind of expanded which was OK with me…makes me think it’s more secure and it is smooth when dry.
Let dry 24 hours at least to let it dry.
Enjoy making your monster nests.


